JavaScript/TypeScript SDK
Track your AI agents with full observability - traces, sub-agents, tools, memory operations, and more.
Installation
- npm
- pnpm
- Yarn
npm install @voltagent/sdk
pnpm add @voltagent/sdk
yarn add @voltagent/sdk
Setup
Initialize the SDK with your credentials:
import { VoltAgentObservabilitySDK } from "@voltagent/sdk";

const sdk = new VoltAgentObservabilitySDK({
  baseUrl: "https://api.voltagent.dev",
  publicKey: "your-public-key",
  secretKey: "your-secret-key",
  autoFlush: true, // Auto-send events
  flushInterval: 3000, // Send every 3 seconds
});
Before using the SDK, you need to create an account at https://console.voltagent.dev/ and set up an organization and project to get your API keys.
Step-by-Step Guide
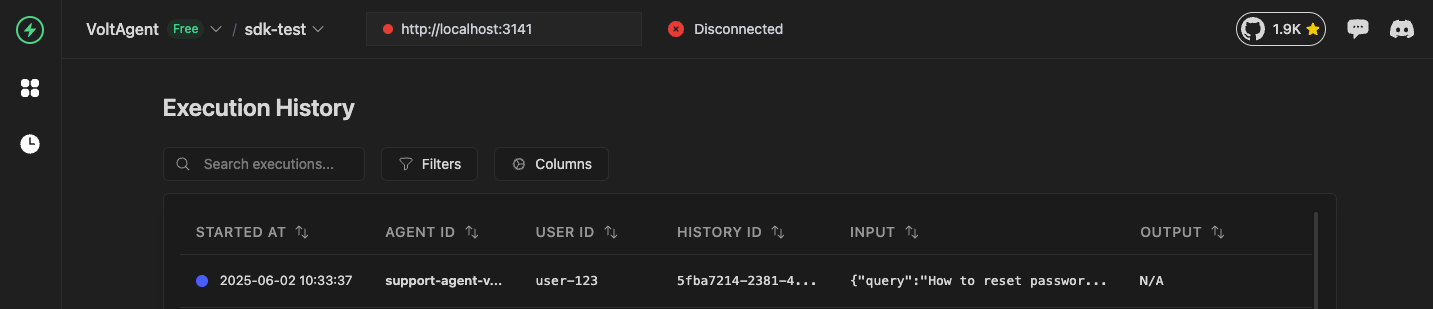
Create a Trace
A trace represents one complete agent execution session. Every agent operation must happen within a trace.
const trace = await sdk.trace({
  name: "Customer Support Query",
  agentId: "support-agent-v1",
  input: { query: "How to reset password?" },
  userId: "user-123",
  conversationId: "conv-456",
  tags: ["support", "password-reset"],
  metadata: {
    priority: "high",
    source: "web-chat",
  },
});
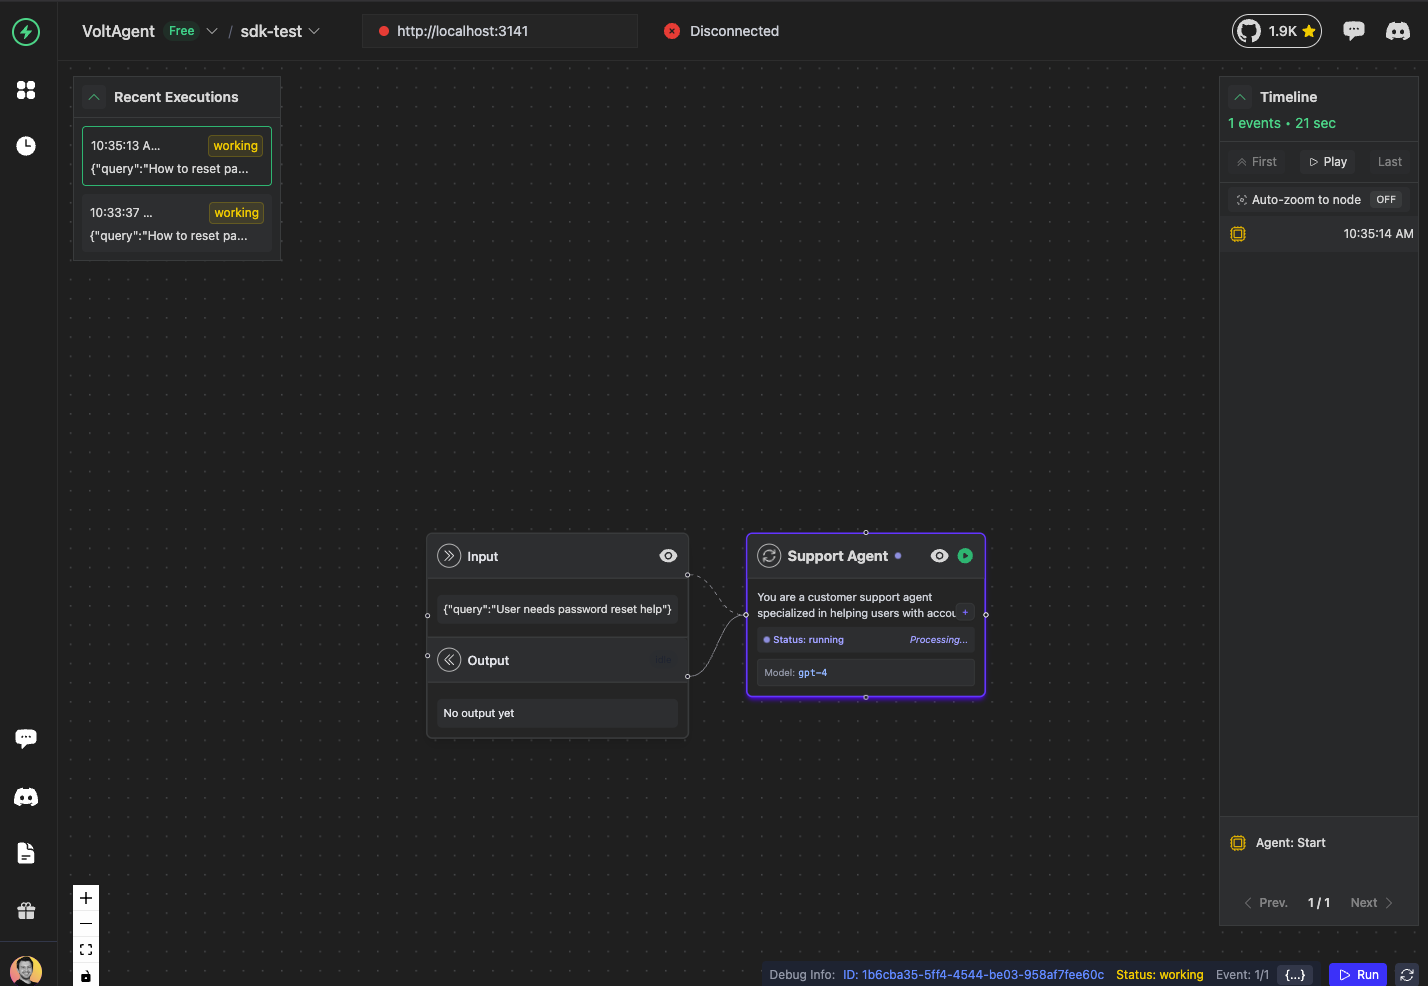
Add an Agent to the Trace
Now let's add the main agent that will handle the user's request:
const agent = await trace.addAgent({
  name: "Support Agent",
  input: { query: "User needs password reset help" },
  instructions:
    "You are a customer support agent specialized in helping users with account issues and password resets.",
  metadata: {
    modelParameters: {
      model: "gpt-4",
    },
  },
});
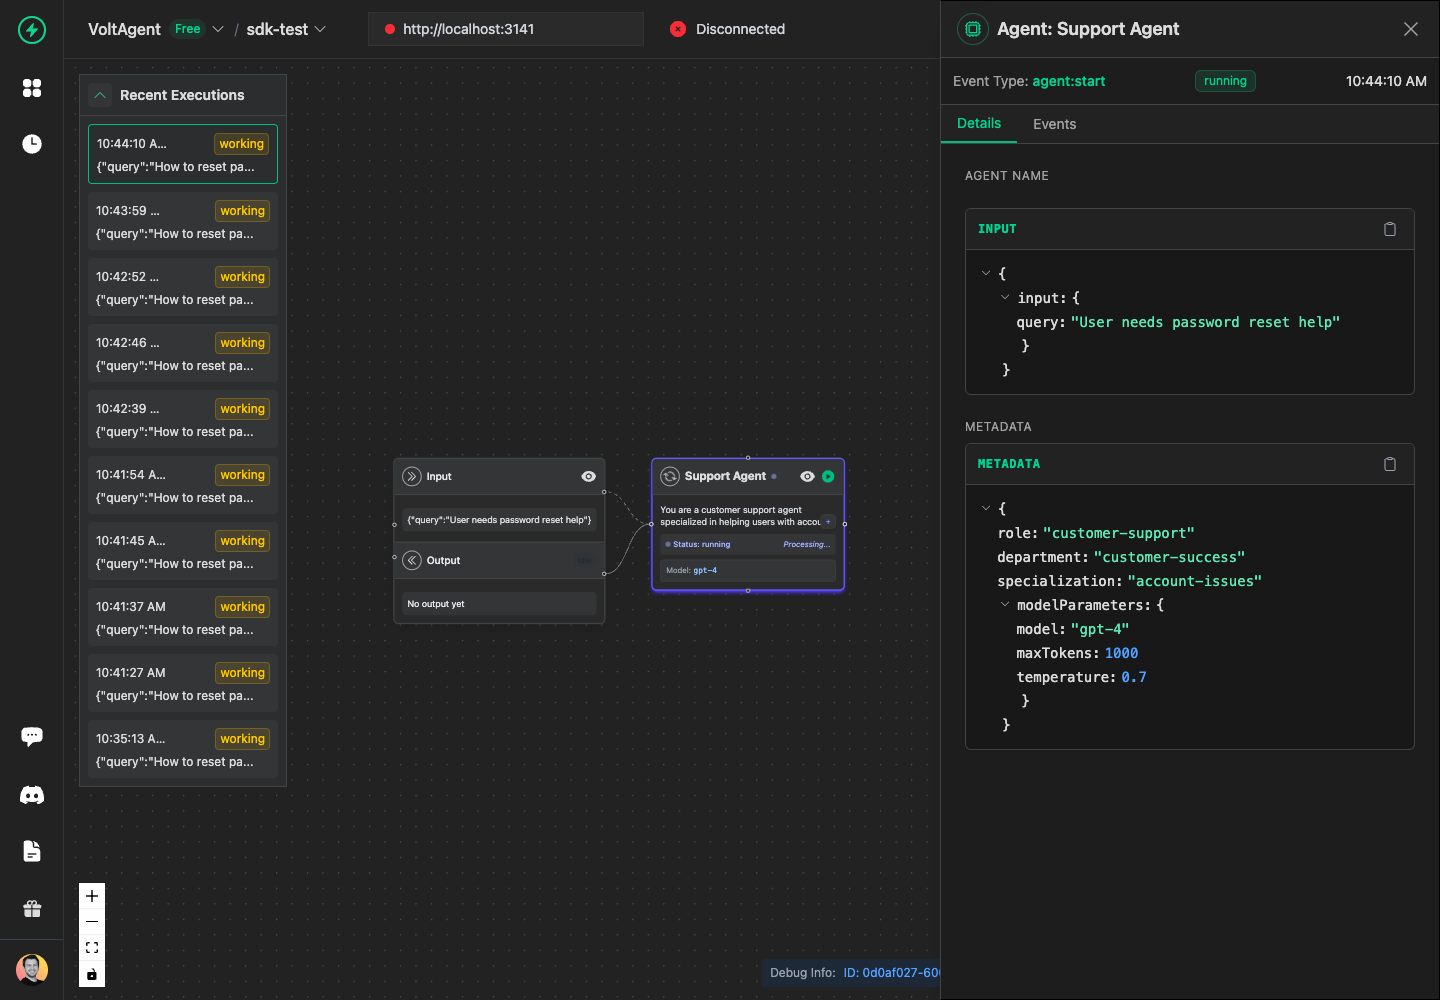
Understanding Agent Metadata
Agent metadata helps you organize and filter your observability data. Here's what each field means:
modelParameters: Model configuration including the AI model being used- Custom fields: Add any domain-specific metadata for your use case
metadata: {
  modelParameters: {
    model: "gpt-4",
    temperature: 0.7,
    maxTokens: 1000,
  },
  // Add your own custom metadata
  role: "customer-support",
  specialization: "account-issues",
  department: "customer-success",
}
💡 Trace Completion
Traces can be completed in two ways:
Success:
await trace.end({
  output: { result: "Query resolved successfully" },
  status: "completed",
  usage: { promptTokens: 150, completionTokens: 85, totalTokens: 235 },
});
Error:
await trace.end({
  output: { error: "Failed to process query" },
  status: "error",
  metadata: { errorCode: "TIMEOUT" },
});
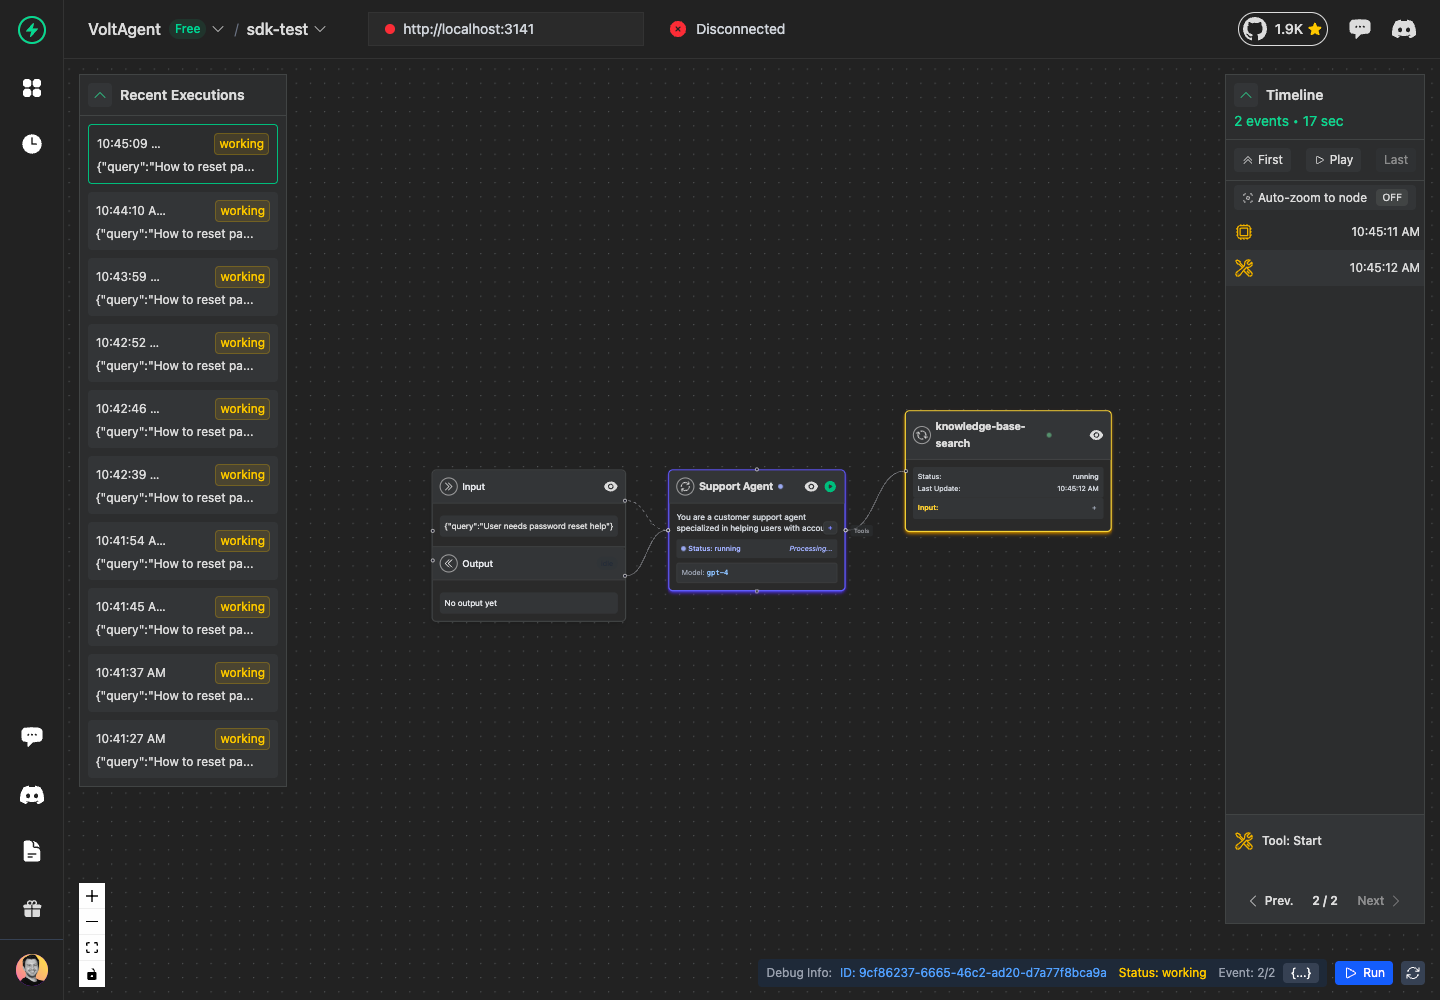
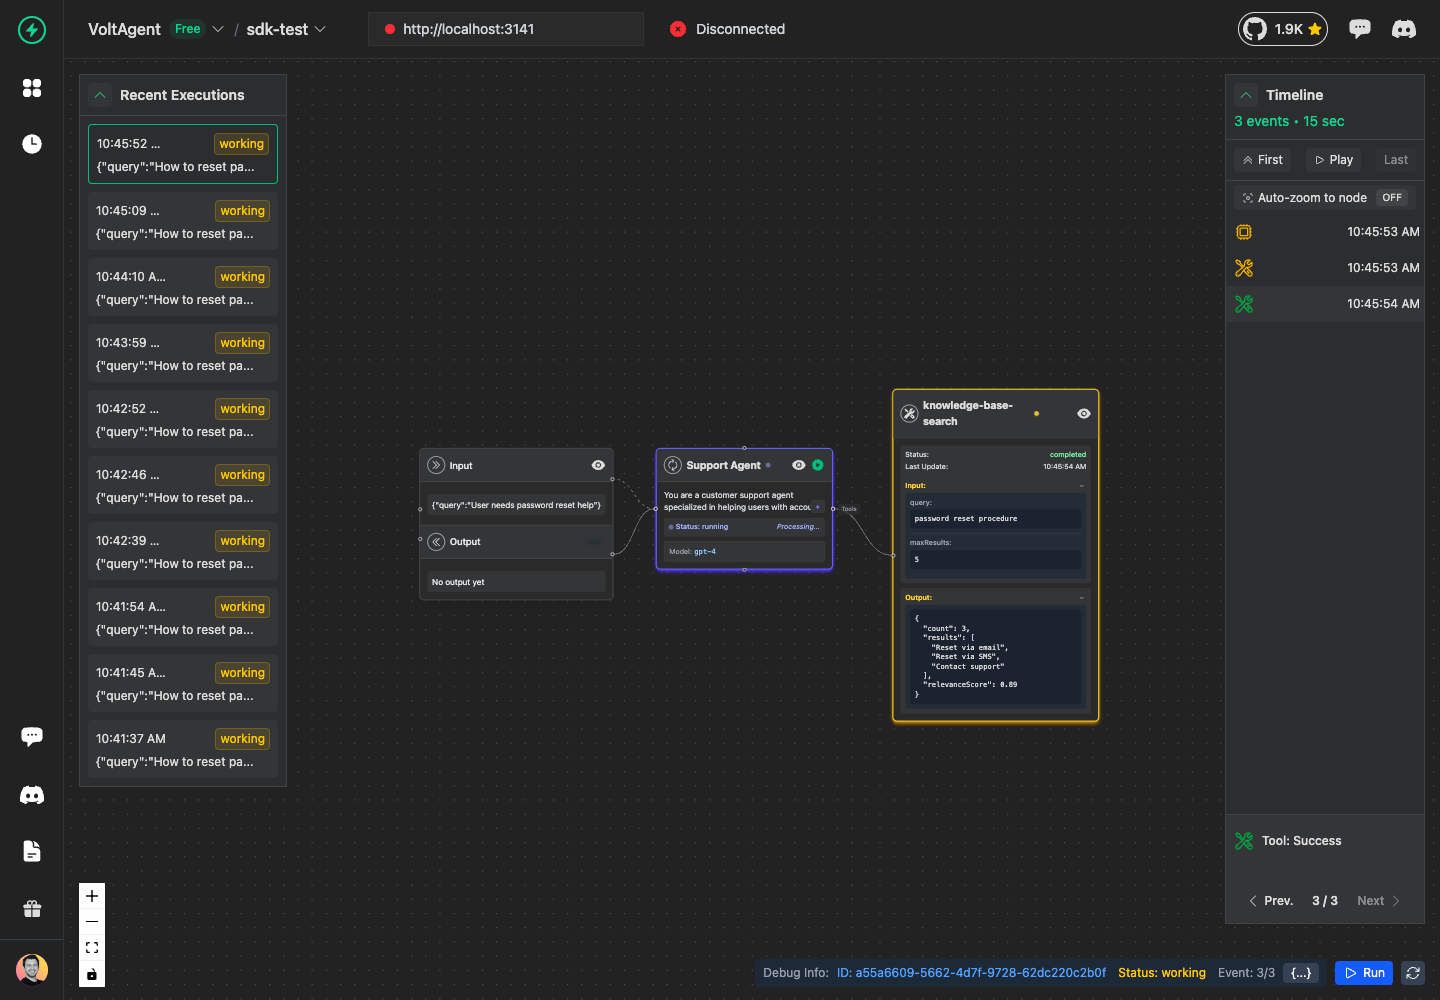
Add a Tool to the Agent
Tools represent external services or APIs that your agent uses. Let's add a knowledge base search tool:
const searchTool = await agent.addTool({
  name: "knowledge-base-search",
  input: {
    query: "password reset procedure",
    maxResults: 5,
  },
  metadata: {
    // Add your own custom metadata
    searchType: "semantic",
    database: "support-kb",
    version: "v2",
  },
});
Tool Success
When the tool executes successfully:
await searchTool.success({
  output: {
    results: ["Reset via email", "Reset via SMS", "Contact support"],
    count: 3,
    relevanceScore: 0.89,
  },
  metadata: {
    searchTime: "0.2s",
    indexUsed: "support-kb-v2",
  },
});
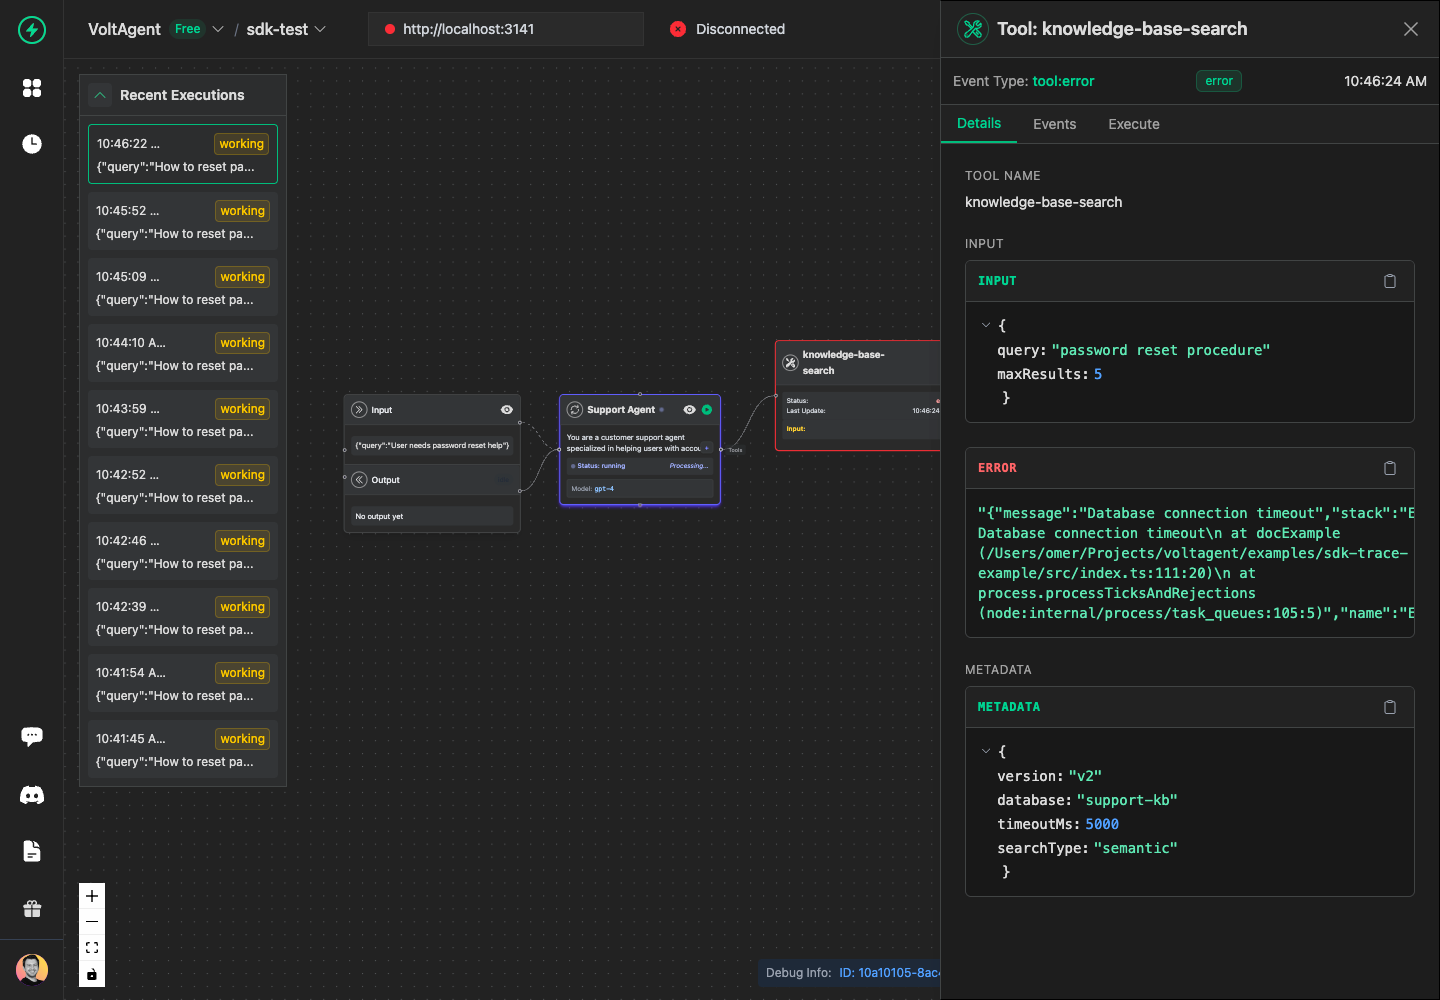
Tool Error
When the tool fails, you can report errors in two ways:
Using Error object:
await searchTool.error({
  statusMessage: new Error("Database connection timeout"),
  metadata: {
    database: "support-kb",
    timeoutMs: 5000,
  },
});
Using structured error:
await searchTool.error({
  statusMessage: {
    message: "Database connection timeout",
    code: "DB_TIMEOUT",
    details: { timeoutMs: 5000 },
  },
  metadata: {
    database: "support-kb",
    timeoutMs: 5000,
  },
});
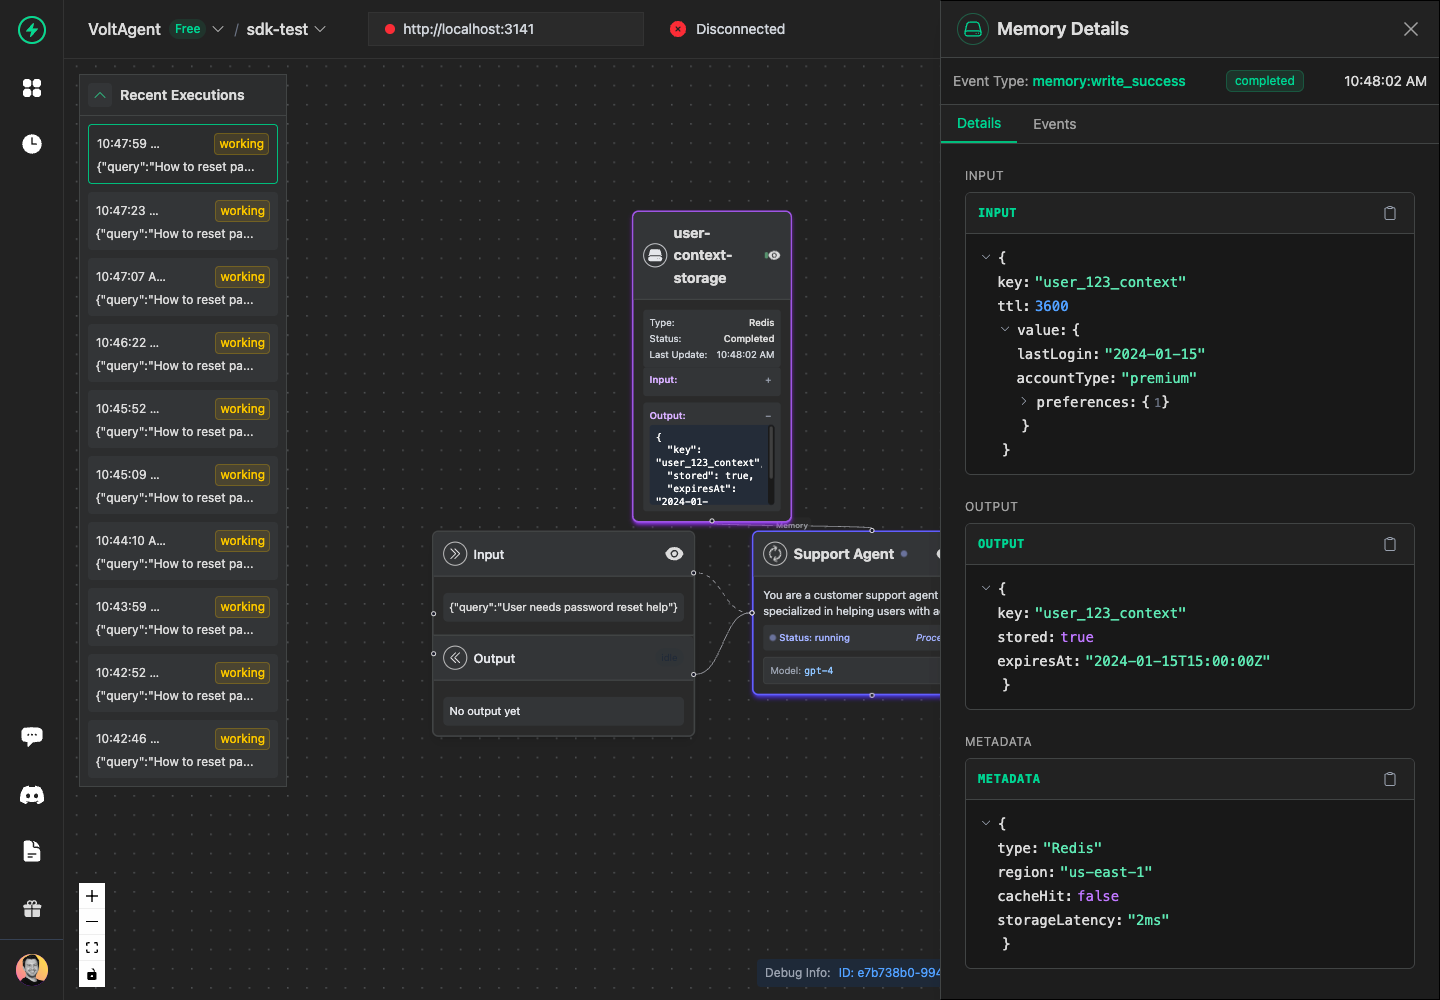
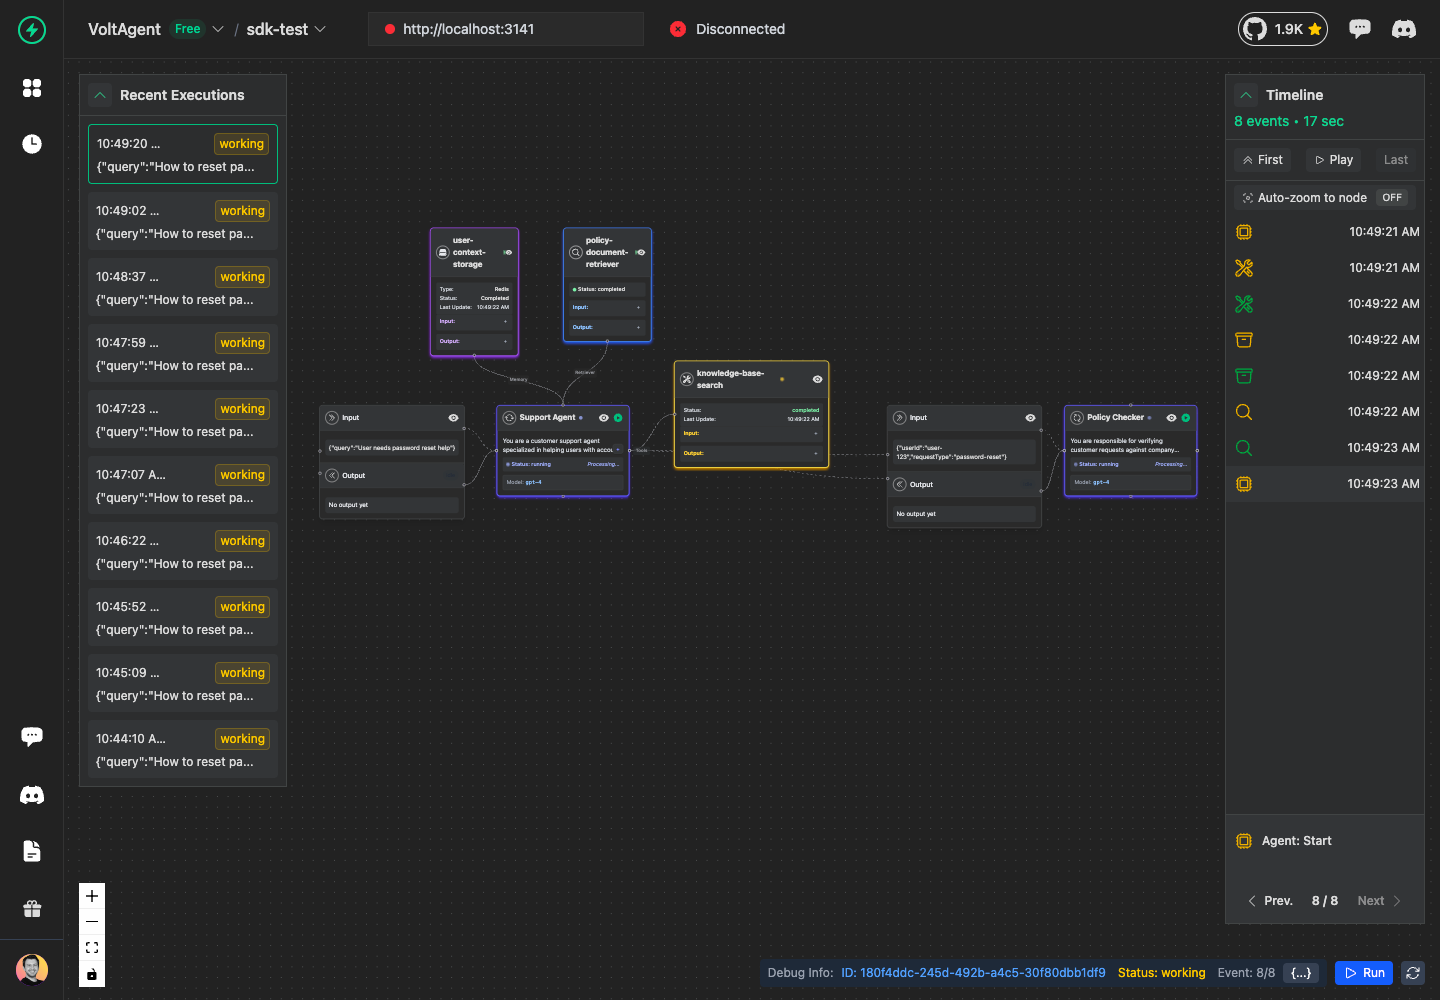
Add Memory Operations
Memory operations track data storage and retrieval. They work exactly like tools with success and error states:
const memoryOp = await agent.addMemory({
  name: "user-context-storage",
  input: {
    key: "user_123_context",
    value: {
      lastLogin: "2024-01-15",
      accountType: "premium",
      preferences: { language: "en" },
    },
    ttl: 3600, // 1 hour
  },
  metadata: {
    type: "redis",
    region: "us-east-1",
  },
});

Memory Success
await memoryOp.success({
  output: {
    stored: true,
    key: "user_123_context",
    expiresAt: "2024-01-15T15:00:00Z",
  },
  metadata: {
    cacheHit: false,
    storageLatency: "2ms",
  },
});
Memory Error
await memoryOp.error({
  statusMessage: new Error("Redis connection failed"),
  metadata: {
    storageType: "redis",
    errorCode: "CONNECTION_TIMEOUT",
  },
});
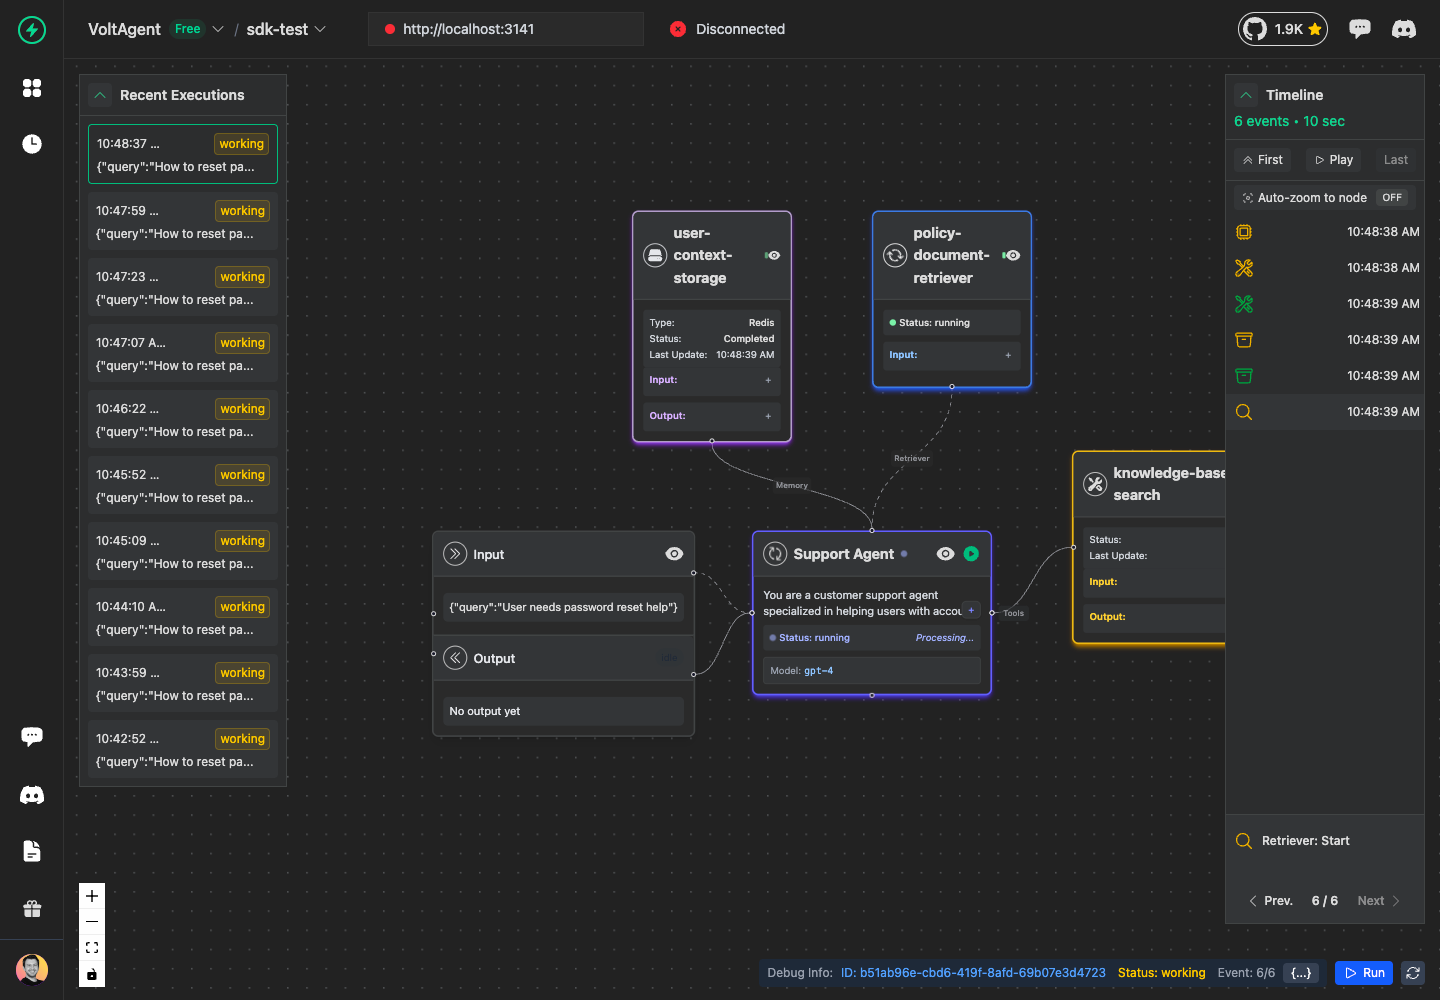
Add Retrieval Operations
Retrievers handle data retrieval from vector stores, databases, or knowledge bases. They also follow the same success/error pattern:
const retriever = await agent.addRetriever({
  name: "policy-document-retriever",
  input: {
    query: "password reset policy for premium users",
    maxDocuments: 3,
    threshold: 0.8,
  },
  metadata: {
    vectorStore: "pinecone",
    embeddingModel: "text-embedding-ada-002",
  },
});
Retriever Success
await retriever.success({
  output: {
    documents: [
      "Premium users can reset passwords instantly via email",
      "Password reset requires 2FA verification for premium accounts",
      "Premium users have 24/7 phone support for password issues",
    ],
    relevanceScores: [0.95, 0.88, 0.82],
  },
  metadata: {
    searchTime: "0.3s",
    documentsScanned: 1500,
  },
});
Retriever Error
await retriever.error({
  statusMessage: new Error("Vector store unavailable"),
  metadata: {
    vectorStore: "pinecone",
    errorType: "SERVICE_UNAVAILABLE",
  },
});
Working with Sub-Agents
Sub-agents create hierarchical agent structures. Each sub-agent can have its own tools, memory operations, and even more sub-agents:
// Create a sub-agent under the main agent
const policyChecker = await agent.addAgent({
  name: "Policy Checker",
  input: {
    userId: "user-123",
    requestType: "password-reset",
  },
  instructions: "You are responsible for verifying customer requests against company policies.",
  metadata: {
    role: "policy-verification",
    modelParameters: {
      model: "gpt-4",
    },
  },
});
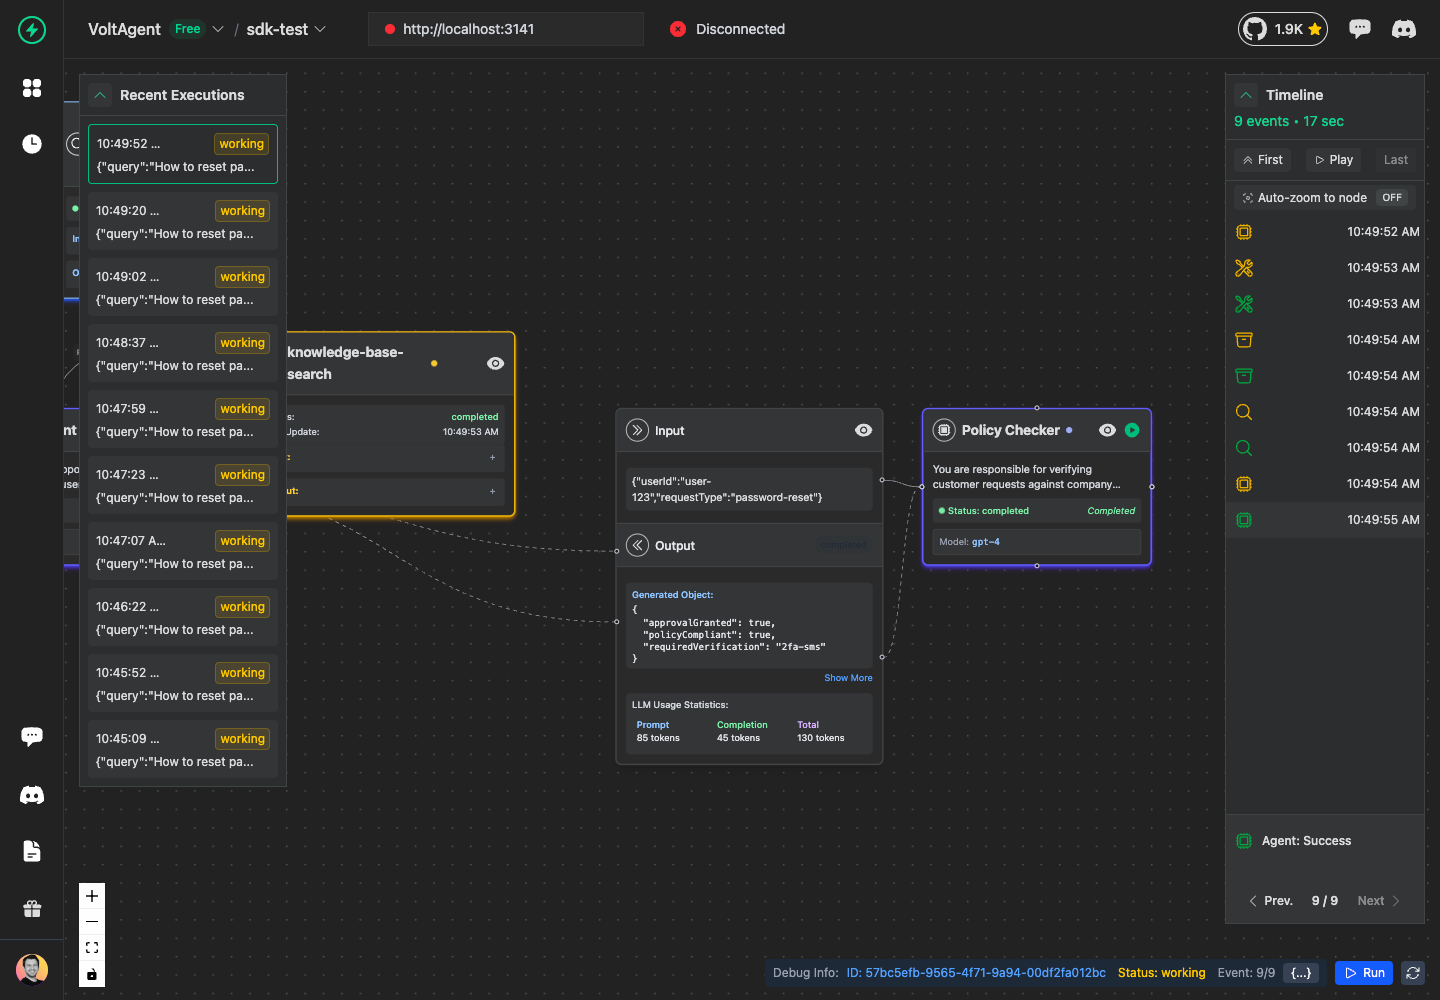
Sub-Agent Success
await policyChecker.success({
  output: {
    policyCompliant: true,
    requiredVerification: "2fa-sms",
    approvalGranted: true,
  },
  usage: {
    promptTokens: 85,
    completionTokens: 45,
    totalTokens: 130,
  },
  metadata: {
    policiesChecked: ["password-policy", "premium-user-policy"],
    complianceScore: 0.95,
  },
});
Sub-Agent Error
await policyChecker.error({
  statusMessage: new Error("Policy verification failed"),
  stage: "policy_check",
  metadata: {
    failedPolicies: ["premium-user-policy"],
    errorCode: "POLICY_VIOLATION",
  },
});
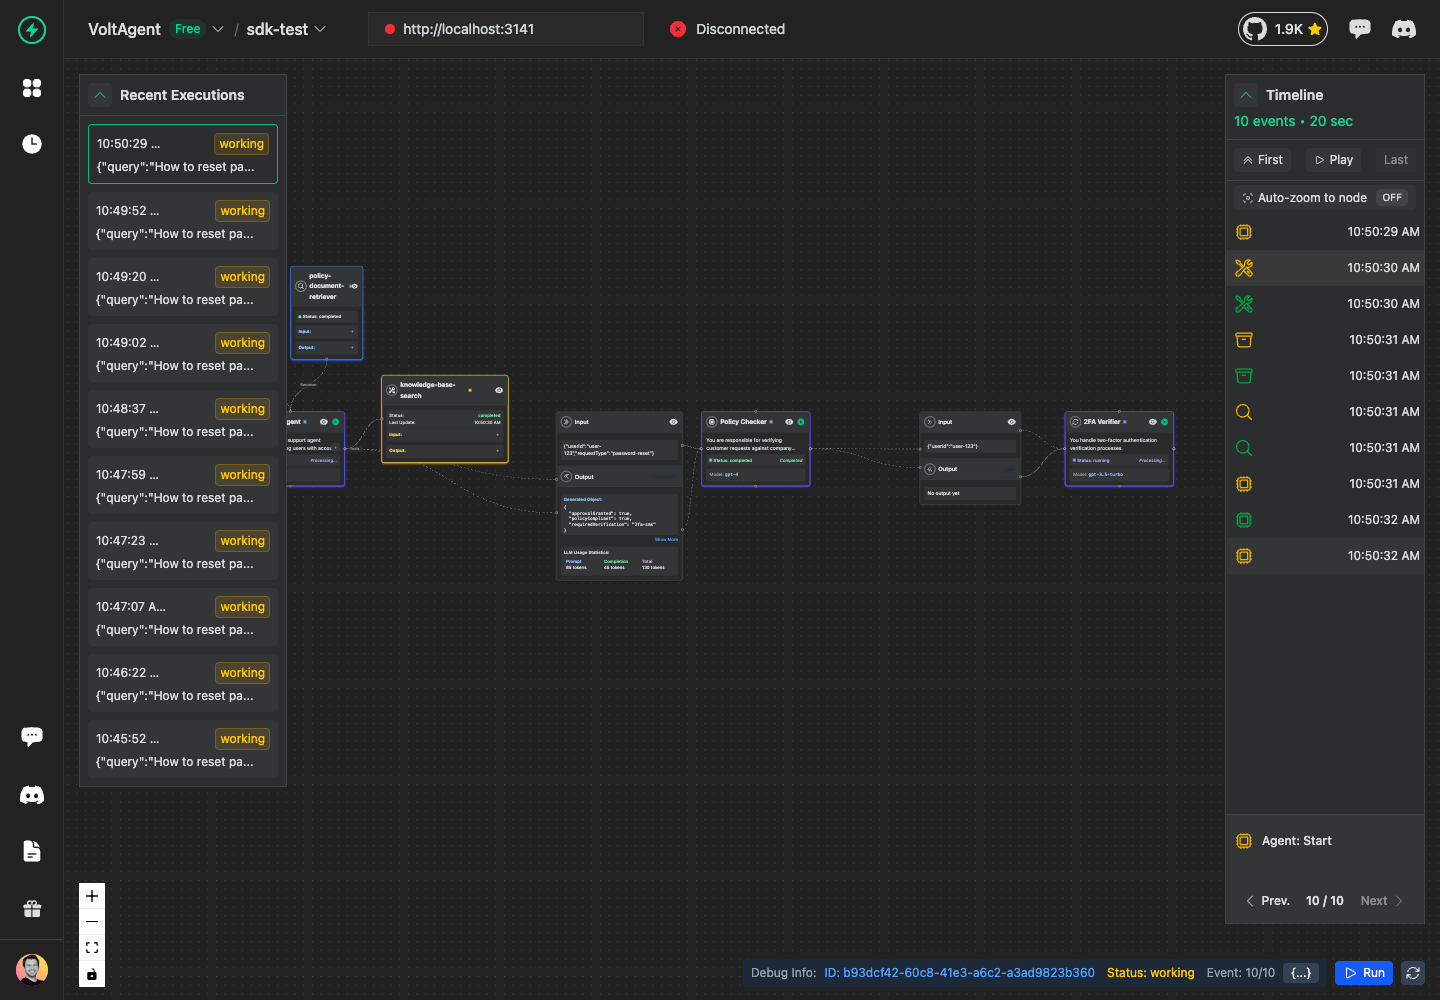
Creating Deeper Hierarchies
You can create multiple levels of sub-agents:
// Sub-sub-agent under policy checker
const verifier = await policyChecker.addAgent({
  name: "2FA Verifier",
  input: { userId: "user-123" },
  instructions: "You handle two-factor authentication verification processes.",
  metadata: {
    role: "two-factor-auth",
    modelParameters: {
      model: "gpt-3.5-turbo",
    },
  },
});
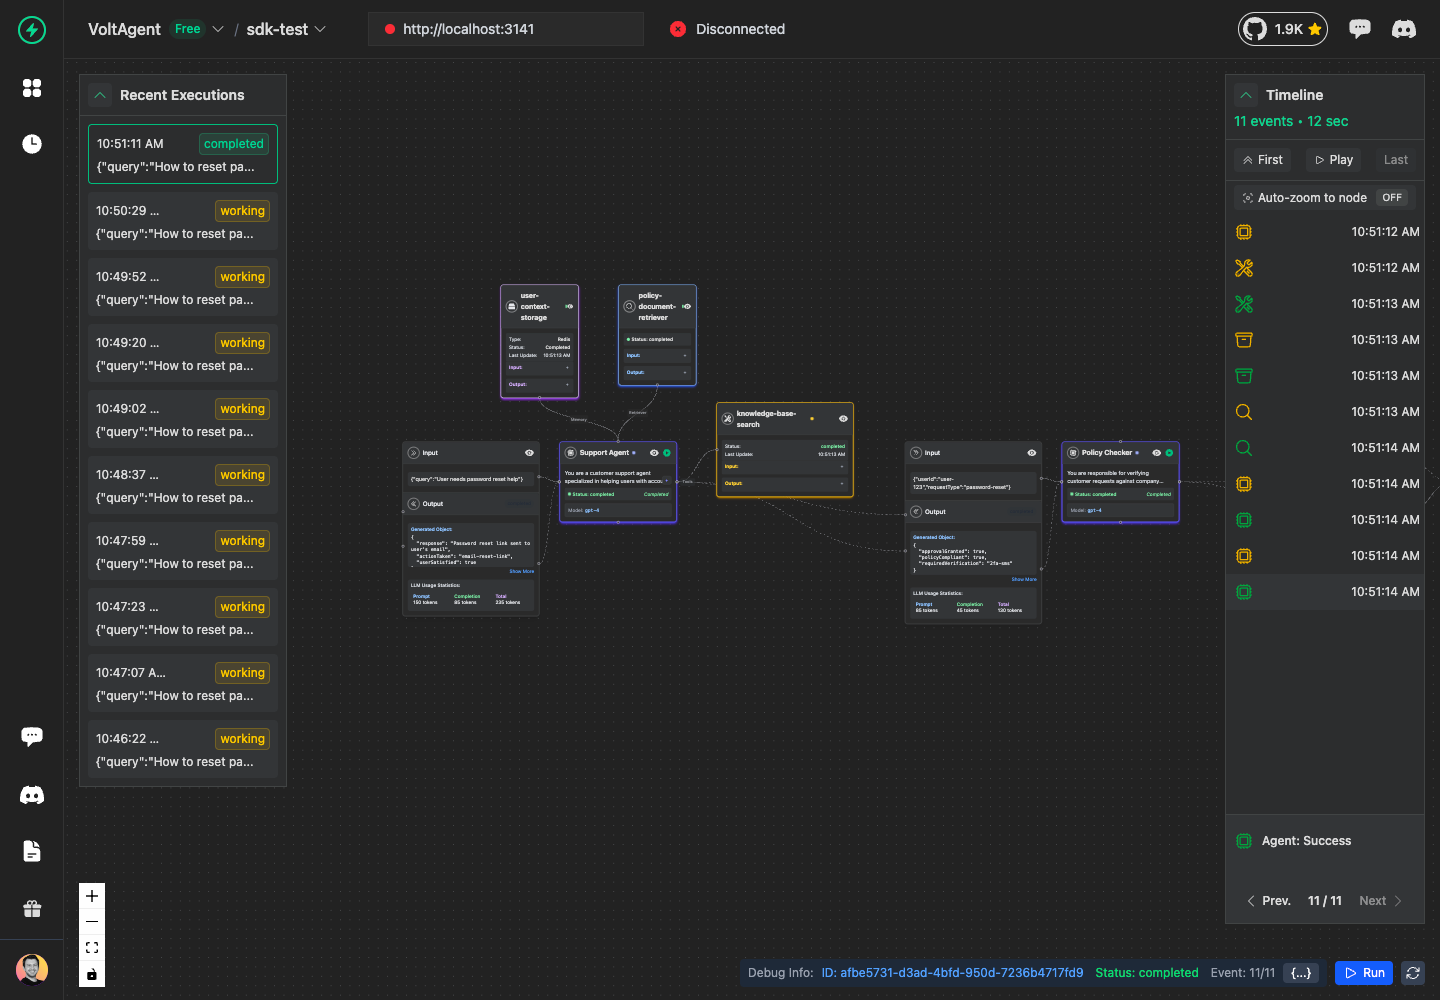
Complete the Agent and Trace
Finally, complete your main agent and trace:
// Complete the main agent
await agent.success({
  output: {
    response: "Password reset link sent to user's email",
    actionTaken: "email-reset-link",
    userSatisfied: true,
  },
  usage: {
    promptTokens: 150,
    completionTokens: 85,
    totalTokens: 235,
  },
  metadata: {
    responseTime: "2.1s",
    confidenceScore: 0.95,
  },
});

// Complete the trace
await trace.end({
  output: {
    result: "Customer support query resolved successfully",
    resolution: "password-reset-completed",
  },
  status: "completed",
  usage: {
    promptTokens: 150,
    completionTokens: 85,
    totalTokens: 235,
  },
  metadata: {
    totalAgents: 2,
    totalOperations: 4,
    successRate: 1.0,
  },
});
Best Practices
- Always call
sdk.flush()before your application exits - Use meaningful names for traces, agents, tools, and operations
- Include relevant metadata for debugging and analytics
- Track token usage in the
usagefield, not metadata - Handle errors properly with descriptive error messages
- Use hierarchical agents for complex workflows
- Set appropriate tags for easy filtering and search
Complete Example
import { VoltAgentObservabilitySDK } from "@voltagent/sdk";

async function runCompleteExample() {
  const sdk = new VoltAgentObservabilitySDK({
    baseUrl: process.env.VOLTAGENT_BASE_URL,
    publicKey: process.env.VOLTAGENT_PUBLIC_KEY,
    secretKey: process.env.VOLTAGENT_SECRET_KEY,
    autoFlush: true,
  });

  try {
    // 1. Create trace
    const trace = await sdk.trace({
      name: "Complete Example",
      agentId: "example-agent",
      input: { query: "Show me how to use the SDK" },
    });

    // 2. Add agent
    const agent = await trace.addAgent({
      name: "Example Agent",
      input: { task: "Demonstrate SDK usage" },
      instructions: "You demonstrate how to use the VoltAgent SDK effectively.",
      metadata: {
        modelParameters: { model: "gpt-4" },
      },
    });

    // 3. Add tool
    const tool = await agent.addTool({
      name: "example-tool",
      input: { action: "demonstrate" },
    });

    await tool.success({
      output: { result: "Tool executed successfully" },
    });

    // 4. Complete agent
    await agent.success({
      output: { response: "SDK demonstration completed" },
      usage: { promptTokens: 50, completionTokens: 30, totalTokens: 80 },
    });

    // 5. Complete trace
    await trace.end({
      output: { result: "Example completed successfully" },
      status: "completed",
    });

    await sdk.flush();
  } catch (error) {
    console.error("Example failed:", error);
  } finally {
    await sdk.shutdown();
  }
}